The 7 S's of crime scene investigation, step by step
The 7 S's of crime scene investigation are secure the scene, separate the witnesses, scan, see, sketch, search for evidence, then secure and collect it: seven steps in an order that keeps evidence intact.
The 7 S's are secure the scene, separate the witnesses, scan the scene, see the scene, sketch the scene, search for evidence, and secure and collect evidence.
The order is the point: the scene is protected before it is recorded, and recorded before anything is moved or collected.
The 7 S's are a teaching mnemonic. Professional guides, such as the US Department of Justice's, describe the same work in other words, and an agency's own procedures come first.
Seeing and sketching are where the work has changed most: a 3D scan records the geometry a sketch measures by tape, and keeps it measurable after the scene is released.
The 7 S's of crime scene investigation are the order in which investigators work a scene, from the moment the first officer arrives to the last item packed as evidence. Students learn them as a list; practitioners know them as the reason a scene can still be reconstructed months later.
This guide takes the seven S's one at a time, with the rules the US Department of Justice's crime scene guide sets for each, shows how they line up with the professional models, and explains where the steps have changed.
What are the 7 S's of crime scene investigation?
The 7 S's of crime scene investigation are seven steps for processing a scene in order: secure the scene, separate the witnesses, scan the scene, see the scene, sketch the scene, search for evidence, and secure and collect evidence. Each step preserves what the next one needs, so the order matters as much as the steps themselves.
Secure the scene: make it safe, then protect it.
Separate the witnesses: keep their accounts independent.
Scan the scene: a first walk-through to see what is there.
See the scene: photograph it as it was found.
Sketch the scene: draw and measure it to fixed points.
Search for evidence: a systematic pass for what was missed.
Secure and collect evidence: package, label and log every item.
The list comes from teaching rather than from a standard: it is set out in Bertino's textbook Forensic Science: Fundamentals & Investigations and used in school and college forensic science courses. Professional guides describe the same work in their own terms, and every agency works to its own written procedures; the seven S's are a way to remember the sequence, not a substitute for them.
The seven S's, one at a time
Each step below follows Crime Scene Investigation: A Guide for Law Enforcement, first written by a national working group in 2000 and updated by the National Forensic Science Technology Center in 2013. It sets out the principle, policy and procedure for every task, and many agencies' procedures follow its logic.
1. Secure the scene
Securing the scene is the first step of any crime scene investigation, and it falls to the first officer to arrive. Safety comes first: the officer checks for threats, gets medical help to anyone who needs it and controls the people present. Only then does preserving the evidence take over.
Boundaries start at the focal point, where the crime happened, and extend outward to the paths of entry and exit and anywhere a victim or evidence may have been moved. The guide's advice is to draw them wide, because a boundary can be reduced in size later but cannot as easily be expanded. Tape, cones, vehicles or the existing doors and walls mark it, and a log records everyone who enters and leaves.
The reason is Locard's exchange principle: every person who crosses a scene brings something in and takes something out. Each unlogged entry is a source of contamination someone may have to account for in court.
2. Separate the witnesses
Witnesses are kept apart so that each gives an account of what they saw rather than a version shaped by the others. Investigators interview them at the scene separately and take each to the station separately from other witnesses and suspects.
Where each witness stood is recorded too. A later reconstruction may need to test what could actually be seen from that spot, which is the work of line-of-sight analysis.
3. Scan the scene
Scanning the scene means a first, careful walk-through before anything is touched. The investigator in charge identifies the primary scene, where the crime took place, and any secondary scenes, such as a vehicle or the route a body was moved along, spots fragile and transient evidence that has to be dealt with first, and decides what documentation the scene needs.
Conditions are noted at this stage, because they change: whether lights were on or off, the position of doors and windows, smells, temperature and weather. A path into the scene that has been checked for evidence is often set up, so that everyone else uses the same route.
4. See the scene
Seeing the scene is the photographic record. The guide asks for overall, midrange and close-up coverage: overall views of the scene and its surroundings, midrange photographs that establish how objects relate to each other and to reference points, and close-ups of each item with and without a scale or evidence marker. Video can supplement the photographs but not replace them.
Photographs come before the sketch and before any item is moved, so that the record shows the scene as it was found. Victims, the area under a body once it has been removed, onlookers and vehicles are photographed too.
A photograph records appearance from one viewpoint; it does not record distances on its own. That is the gap the next step fills, and where 3D scanning compared with photography changes the work most.
5. Sketch the scene
Sketching the scene produces the measured drawing a photograph cannot: where each item lies in relation to fixed points, to scale. The rough sketch is drawn at the scene, after the photographs and before anything is moved. The finished sketch is drawn from it later, and the rough sketch is never altered after leaving the scene.
A crime scene sketch includes:
the case identifier, and north marked on the drawing
the scale used, or a "Not to Scale" note on the rough sketch
a legend that defines every symbol
rooms, doors, windows and furniture, with their dimensions
the position of each item of evidence, numbered to match the evidence log
the distances from each item to fixed reference points such as walls, corners or curbs
The guide asks for measurements accurate to within a quarter of an inch, about 6 mm, taken by one of four methods.
The four measuring methods in the DOJ crime scene guide: triangulation, rectangular coordinates, polar coordinates and a transecting baseline.
Triangulation: measure from two fixed, permanent points in the scene to each item. It works indoors and out.
Rectangular coordinates: measure from two surfaces that meet at a right angle, such as two walls.
Polar coordinates: measure the distance and the angle from a single reference point, for an outdoor scene with only one fixed point.
Transecting baseline: lay a tape across the whole scene and measure out from it at right angles to each item, for a scene with many items where the other methods will not work.
The same guide notes that laser scanning devices are now used for crime scene sketching, by investigators trained in them. A scan records every surface in the scanner's view, so the distances a sketch needs can be taken from it afterwards, including ones nobody thought to measure at the time; crime scene 3D scanning explains the order of that work.
6. Search for evidence
Searching for evidence is a systematic pass over the whole scene for whatever the earlier steps did not find. The lead investigator chooses a method by the size and kind of scene and the number of searchers; the guide lists four crime scene search patterns.
Lane or strip, grid, zone and spiral: the four crime scene search methods in the DOJ guide.
Lane or strip: searchers walk parallel lanes in the same direction, each lane about an arm's length wide.
Grid: a lane search done once and then again at right angles. It takes twice as long and is more thorough.
Zone: the area is divided into adjacent zones searched in turn; the smaller the zone, the more methodical the search.
Spiral: searchers move inward or outward in a spiral. An outward spiral risks destroying evidence on the way to the centre.
Whatever the method, each completed area is marked as done, and the team agrees beforehand what happens when someone finds something: who is called over, by which path, and whether everyone else stops.
7. Secure and collect evidence
Securing and collecting evidence comes last because collecting changes the scene for good. Collection is prioritised so that fragile and transient evidence, such as a footwear impression in wet ground or a print in dust, is taken first. Each item is photographed in place, collected by the method its type requires, packaged, sealed, labelled and entered in the evidence log.
From that moment the chain of custody begins: a record of everyone who handles the item, from the scene to the courtroom. A gap in it gives the other side a reason to question the item, and the same applies to digital records; see chain of custody for 3D scan data.
Before the scene is released, the investigator in charge directs a final survey: every area is inspected again, all evidence is accounted for, equipment and materials brought in are removed, and any hazard is reported. Then the scene is released, and it cannot be revisited as it was.
How the 7 S's map to the 7 steps of a crime scene investigation
Professional guides break the same work up differently, which is why a search for the 7 steps of a crime scene investigation returns more than one list. The National Forensic Science Technology Center's seven steps, the six-stage model in Gardner and Krouskup's Practical Crime Scene Processing and Investigation, and the sections of the DOJ guide all describe one sequence:
NFSTC seven stepsForensic Science Simplified
Gardner and KrouskupSix-stage processing model
DOJ guide (2013)Sections of the guide
1. Secure the scene
Establish the scene dimensions; establish security
Assess
A. Arriving at the scene
2. Separate the witnesses
Plan, communicate and coordinate
Assess
A. Arriving at the scene: manage witnesses
3. Scan the scene
Primary survey or walk-through
Observe
B. Preliminary documentation and evaluation
4. See the scene
Document and process the scene
Document
C. Processing the scene: photography
5. Sketch the scene
Document and process the scene
Document
C. Processing the scene: sketching
6. Search for evidence
Document and process; secondary survey
Search
C. Processing the scene: search methods
7. Secure and collect evidence
Record and preserve evidence
Collect, then analyse
C. Collection; D. Completing and recording
Steps as published on Forensic Science Simplified (NFSTC), in Police1's summary of Gardner and Krouskup, and in the DOJ guide's contents.
Outside the United States the order is the same, whatever the local procedure is called. The international standard ISO 21043-2 sets requirements for exactly this chain of work, the recognition, recording, collection, transport and storage of items, so that each item's history can be traced from the scene to the laboratory (NIST on the ISO 21043 series).
Why the order of the 7 S's matters
Each step protects the next. Securing the scene keeps intact the evidence that will be photographed; photographing before sketching records positions before anyone walks among the items with a tape; sketching and photographing before collection record each item where it lay, because once it is lifted its position exists only in the record.
The order is a default, not a ritual. The DOJ guide has a section on time-limited scenes, where deteriorating security or weather moving in limits the time on site, and Forensic Science Simplified notes that steps can be reordered or combined when a scene demands it. What does not change is that recording comes before collection.
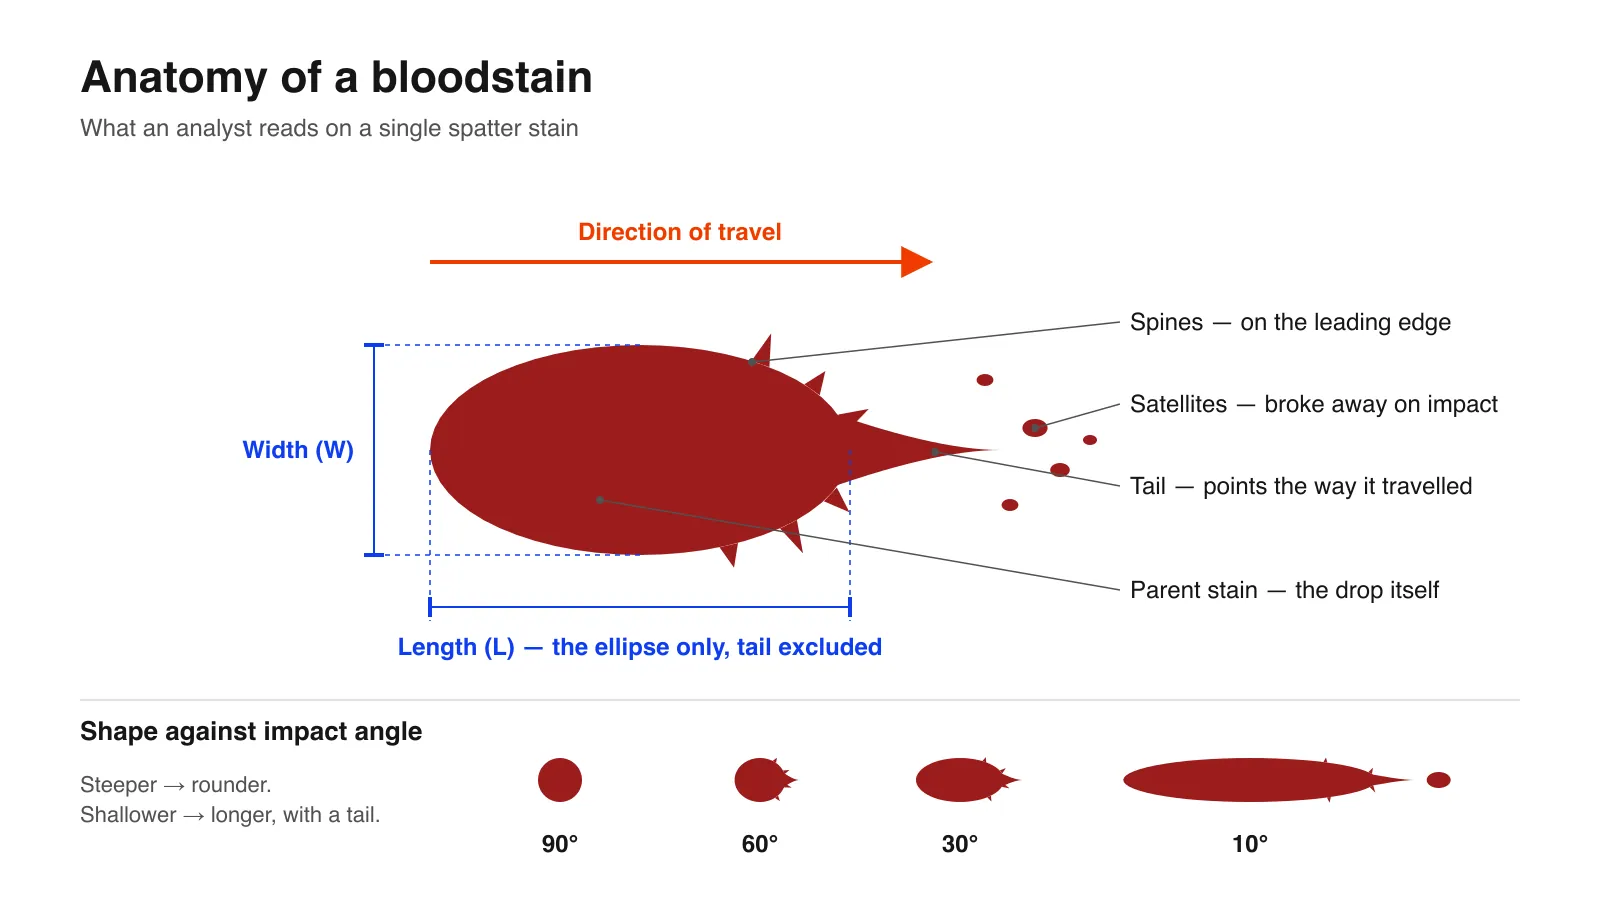
The failures the order guards against are familiar: an unlogged entry, an item moved before it was photographed, a measurement nobody took before the scene was released. The last is the hardest to recover from, because a released scene cannot be put back, which is why blood spatter analysis, for example, depends on stains being measured where they fell.
How the 7 S's are done today
The steps have stayed the same; the tools for seeing and sketching have changed most. Digital photography replaced film, total stations took over some of the tape measurements, and 3D scanning now records a scene's geometry in a single session.
A 3D scan does not replace the photographs or the notes. It takes over most tape measurements and supplements the sketch: every surface in the scanner's view is recorded with its position, so a distance, a height or a line of sight can be measured from the scan after the scene is released. For a room or an outdoor scene, a tripod laser scanner captures the space; a handheld scanner adds evidence and bodies in detail; the two are combined in one model. Laser scanner or total station compares the two ways of measuring a scene.
Used for the whole scene
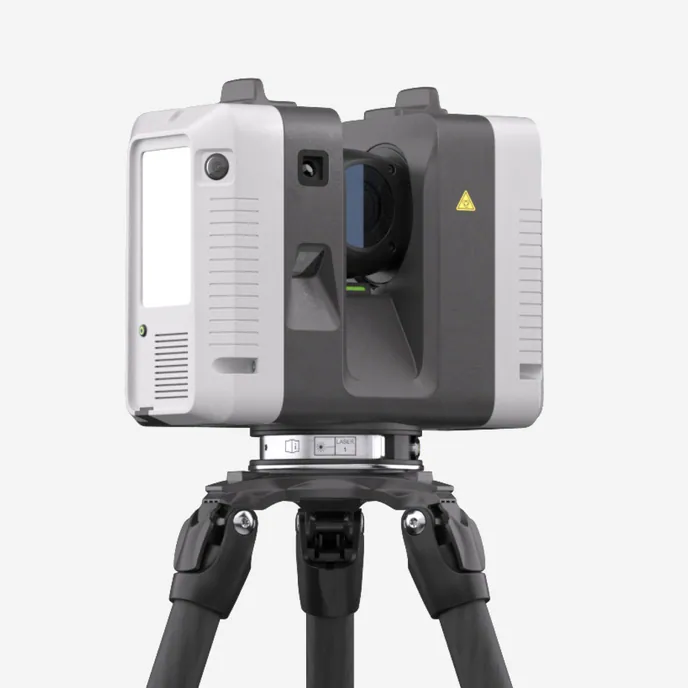
Artec Ray II
A tripod laser scanner that records a room or an outdoor scene from each position, with colour from its built-in cameras, so the overall record and the measurements come from the same capture. Paired with a handheld Artec Leo for evidence and bodies, the whole scene sits in one coordinate system.
On the same scene, Artec Leo records evidence, a body or a vehicle handheld at up to 0.1 mm, without a computer, so detail a tripod position cannot see goes into the same model; evidence documentation in place shows how items are recorded before they are lifted.
Keep the scene measurable after it is released. Book a demo of 3D crime scene documentation.
Secure the scene, separate the witnesses, scan the scene, see the scene, sketch the scene, search for evidence, and secure and collect evidence. They are a mnemonic for the order in which a scene is worked: protect it, record it, then recover the evidence.
What is the first step in a crime scene investigation?
Securing the scene. The first officer makes it safe, gets help to the injured, controls the people present, sets boundaries and starts a log of everyone who enters. Everything later depends on the scene being protected from that moment.
What is the difference between a primary and a secondary crime scene?
The primary scene is where the crime took place. A secondary scene is any other place connected to it, such as where a body was moved, a vehicle that was used or a place a weapon was left. Each is secured, documented and searched in its own right.
What must a crime scene sketch include?
The case identifier, north, the scale or a "Not to Scale" note, a legend, the layout with its dimensions, and each item of evidence measured to fixed points and numbered to match the evidence log. The rough sketch made at the scene is never altered afterwards.
What are the four crime scene search patterns?
Lane or strip, grid, zone and spiral. The lead investigator chooses by the size of the scene and the number of searchers; a grid search is a lane search repeated at right angles, more thorough and about twice as long.
How long does a crime scene investigation take?
It depends on the scene: a small indoor scene may take hours, a homicide or a large outdoor scene can take days. The steps are the same; what changes the time is how much there is to document and collect, and how soon the scene has to be released.
Tell us what kinds of scenes you document, from rooms and vehicles to outdoor sites, and see how a scan records them and what you can still measure after the scene is released.